 Yusral
The cases overview
Find, filter and sort cases, take a quick look without leaving the list, and save your own views.
Click Cases in the menu for all of your team's customer requests.
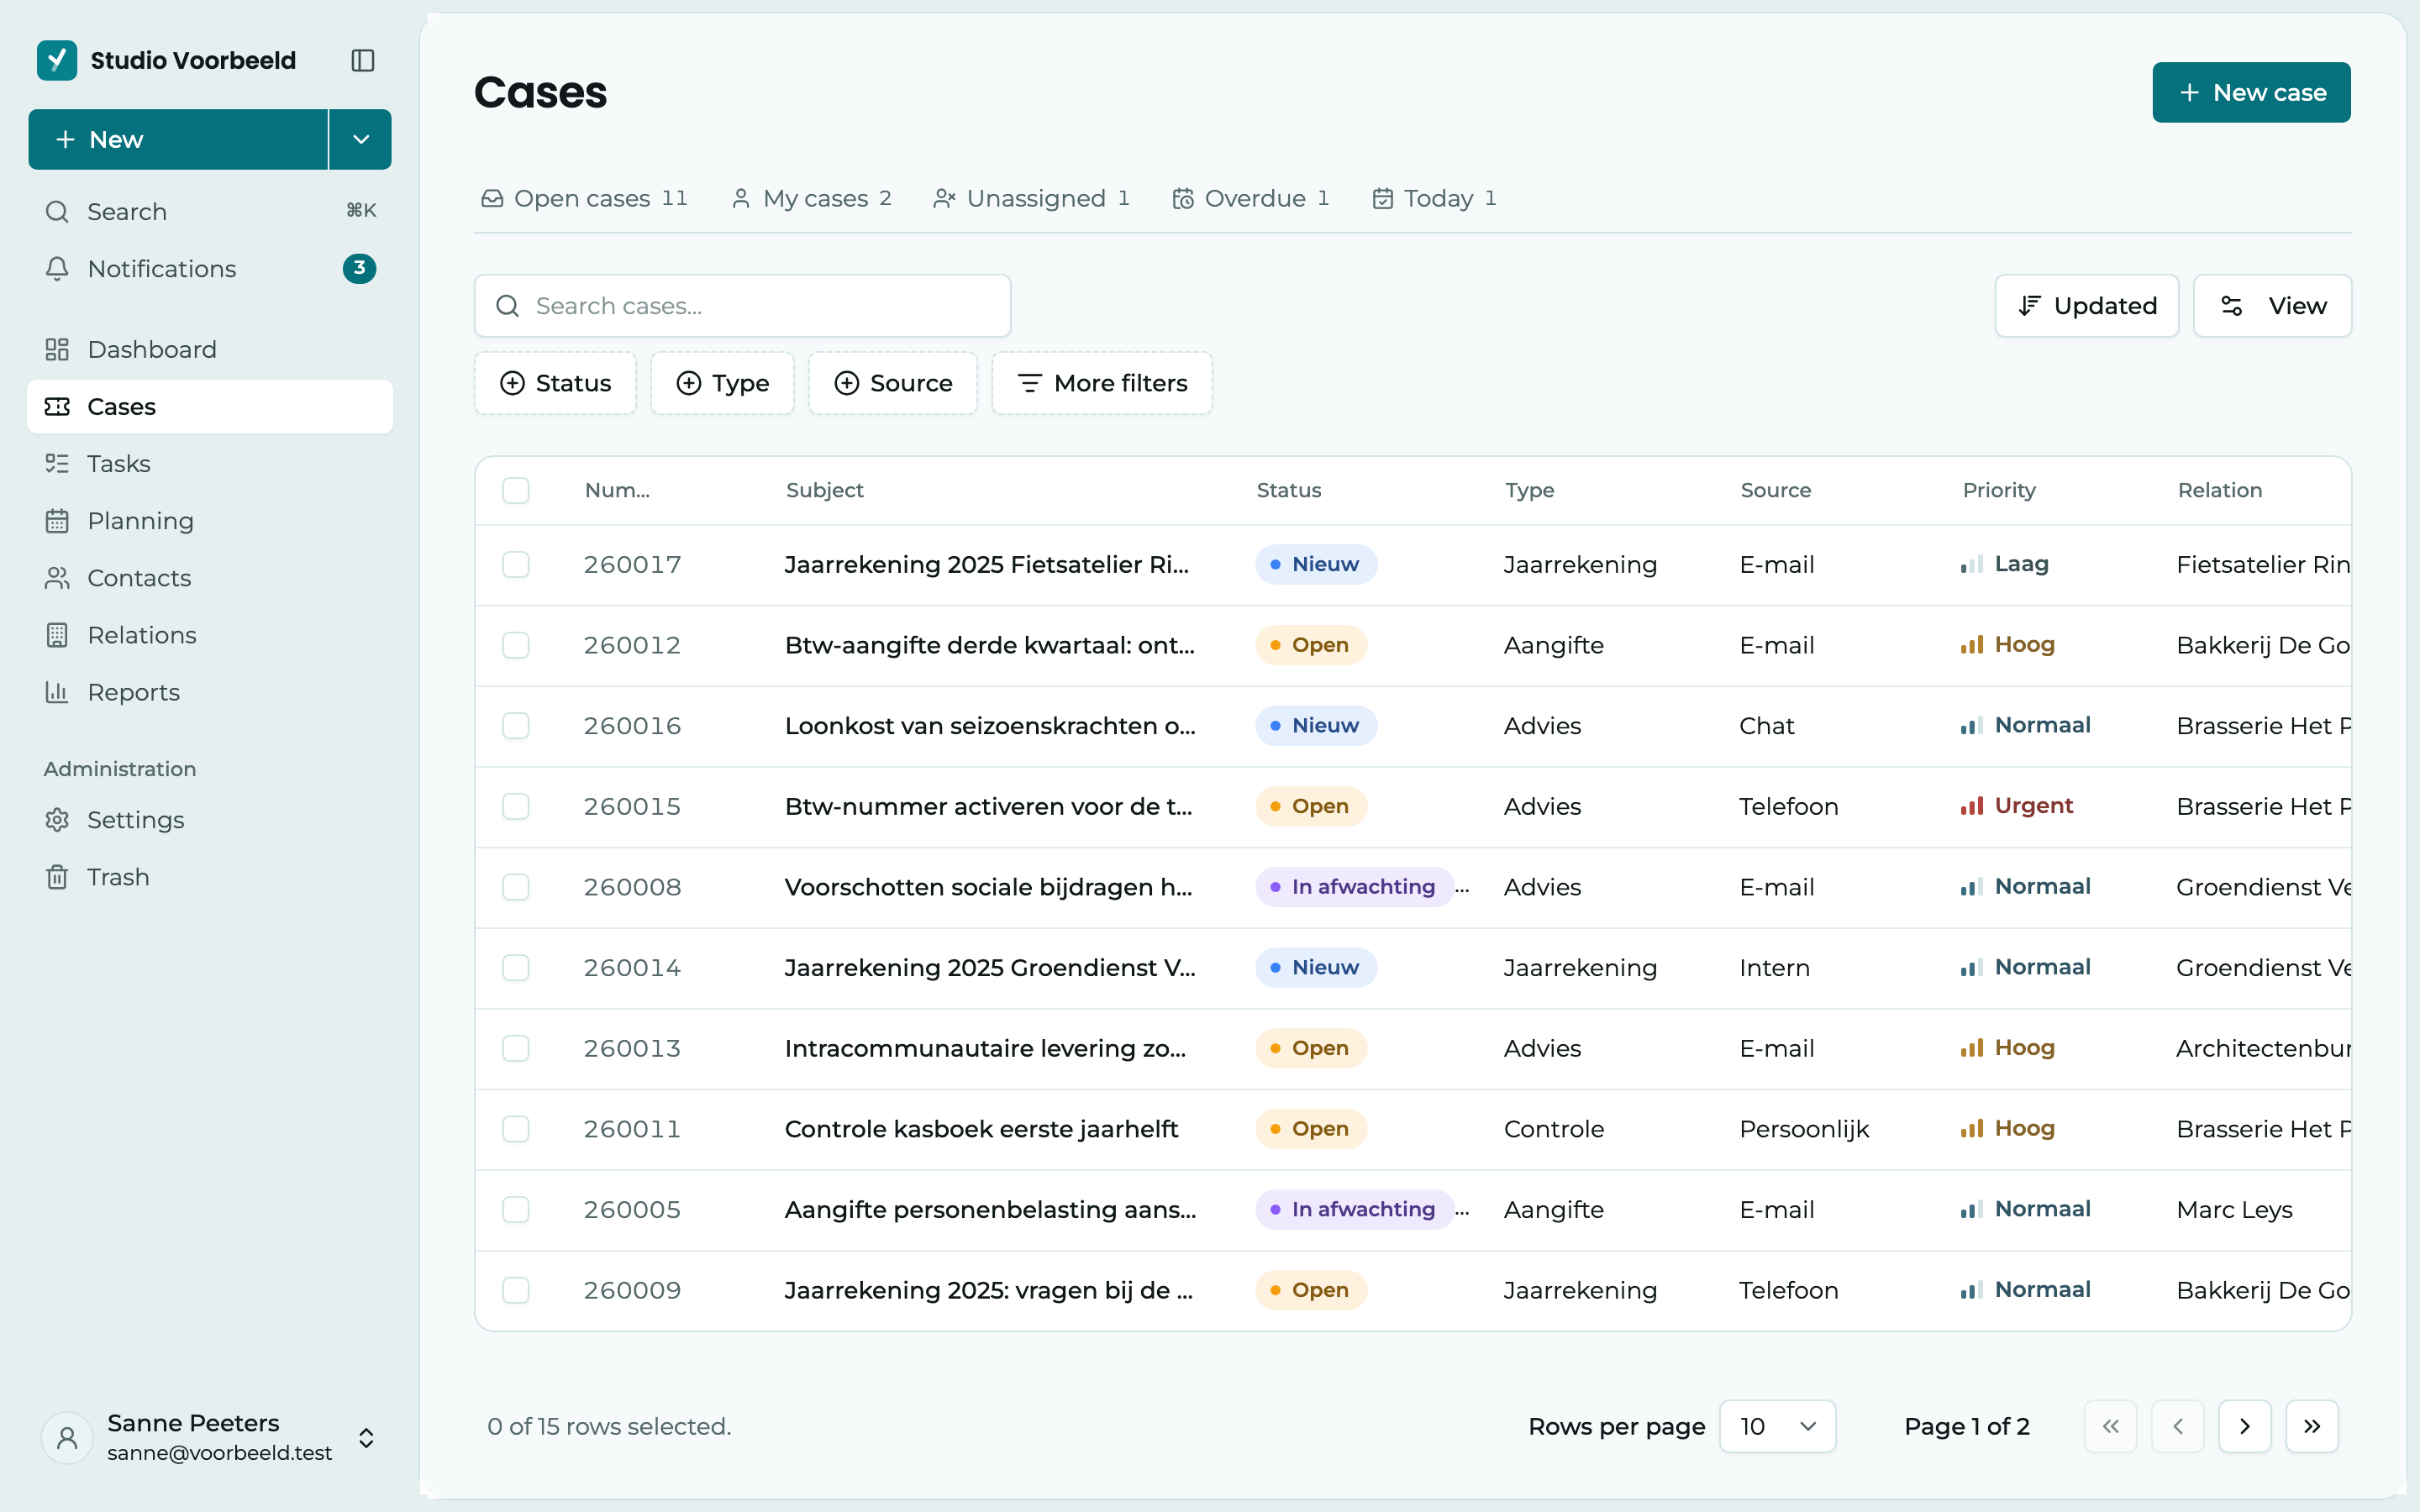
1 The fixed lists. With one click, you see Open cases, My cases, what is still Unassigned, what is Overdue and what is due Today. They only show open cases. The number next to each one says how many cases it holds.
2 Search. In Search cases…, type part of the number, the subject, the relation, the contact or the assignee.
3 Filters. Filter by status, assignee, priority and more. Under More filters are the other fields, including your organisation's custom fields. Clear all turns all filters off in one go.
4 View. Under Columns, choose which columns you see and drag them into the order you want. Then click Save: the table only changes then.
Sort with Sort by, or click a column heading. The list refreshes itself every minute, so a new case appears by itself.
Take a quick look at a case
Click a row, and a panel with the case slides open on the right: the status, priority, assignee, relation, contact and deadline, the summary (if the AI assistant is on) and the Latest message.
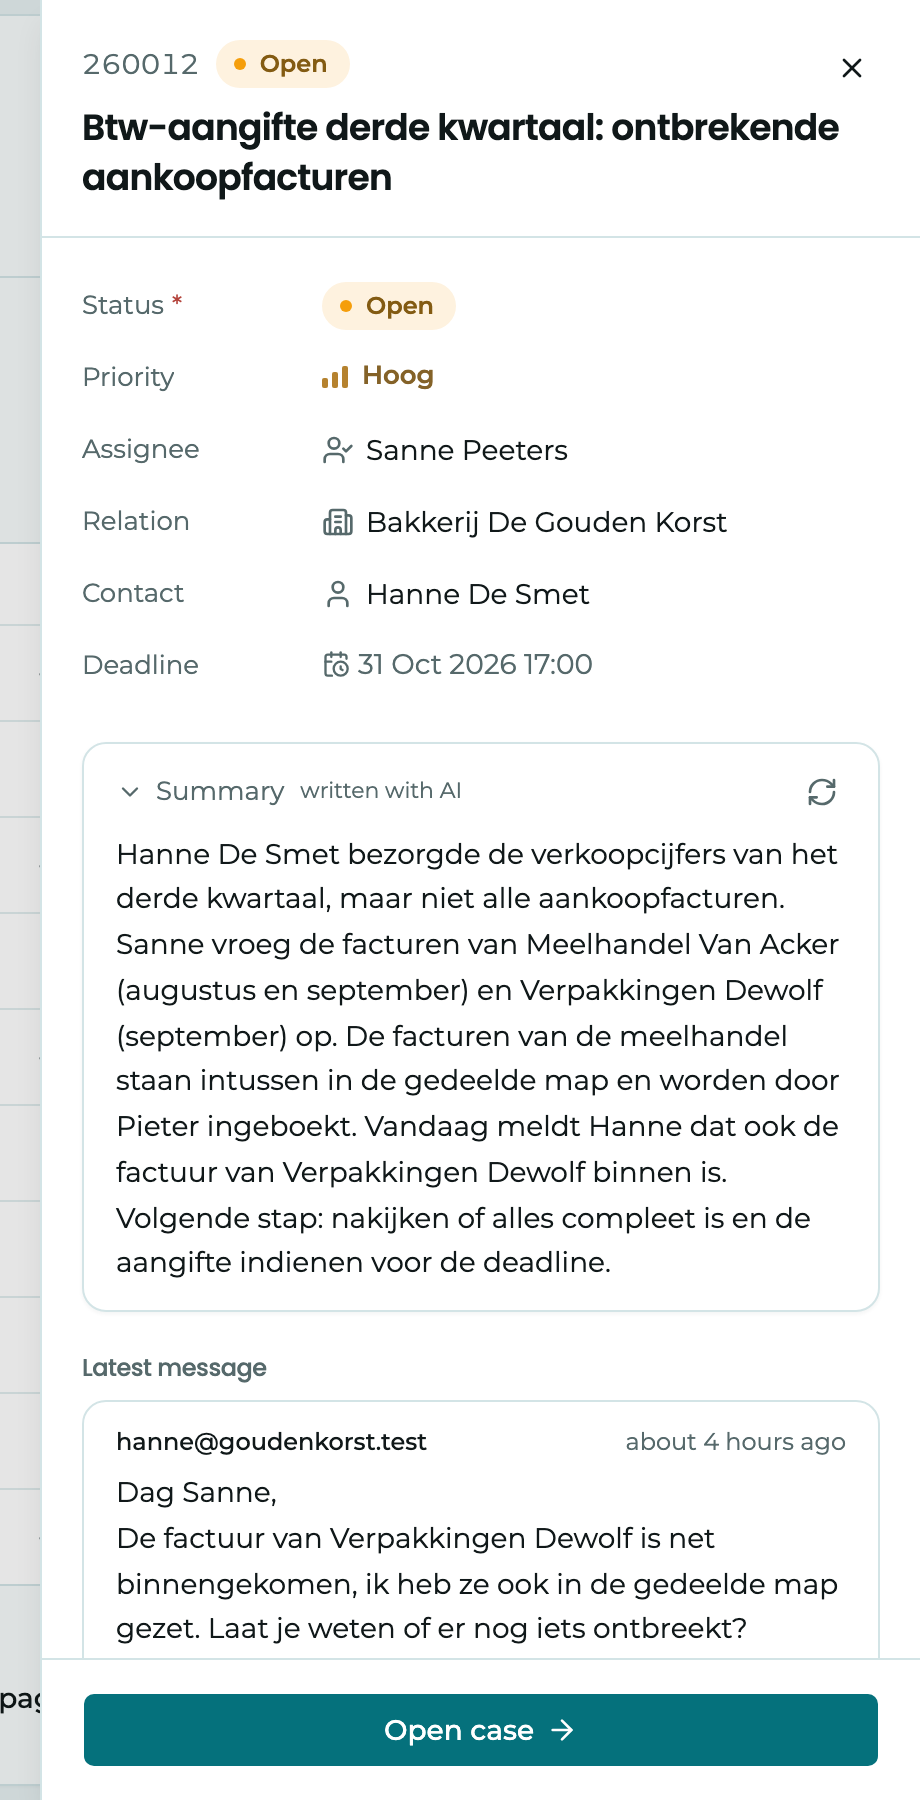
You can change the status, priority and assignee here straight away. That way, you work through the list quickly without opening a case each time. To reply or read the whole case, click Open case at the bottom.
If you click the subject itself in the list, the case opens straight away.
Save a view as a quick filter
Do you often use the same filters, for example all urgent cases for customer X? Then save them as a quick filter.
- Set the filters and the sorting the way you want them.
- Click Save view.
- Give your quick filter a Name and a Colour, and under Visible to, choose who sees it: Only me or The whole team.
From then on, your quick filter sits next to the fixed lists. Through a quick filter's menu, you change its name and colour, update it with the current filters or delete it. Only people with the right to do so can create a quick filter for the whole team, by default the owner and the admins.
Several cases at once
Tick the cases you want to edit. A bar appears at the bottom with what you can do with the selection. Clear selection unticks everything again.
Delete
Delete moves the selected cases to the Trash. You can restore them from there.
Merge
If a customer emailed twice about the same question, you have two cases for one question. Merge them:
- Tick the cases that belong together.
- Choose Merge and confirm.
The messages, notes and tasks all come together in the oldest case. The others go to the trash, with Merged as the reason.
Merged too soon?
Restore a merged case from the trash. It then gets its own messages, notes and tasks back.
An empty list
Do you see Nothing matches these filters.? Then there are cases, just not with the filters that are on now. Click Clear filters, or click one of the fixed lists to start again.
If your organisation has no cases at all yet, you see No cases yet with the Create the first case button. If there are cases in the trash, it says so below, with a link to view them.
If you see This couldn't be loaded, the connection dropped for a moment. Click Try again.
Are there cases your colleagues see that you don't? Then your role lacks the Also view colleagues' cases permission, and you only see the cases assigned to you. Ask your administrator, see Members and roles.