 Yusral
Set up service
Case numbers, confirmation emails, custom fields, quick replies and the lists for status, type, source, priority and category.
Under Settings > Service, you set up how cases work in your organisation. You need the Owner or Admin role.
On the left are the sections: General, Email notifications, Custom fields and Quick replies, and below them, under the word your organisation uses for cases, Statuses, Types, Sources, Priorities and Categories. On a phone, you choose the section from a dropdown list.
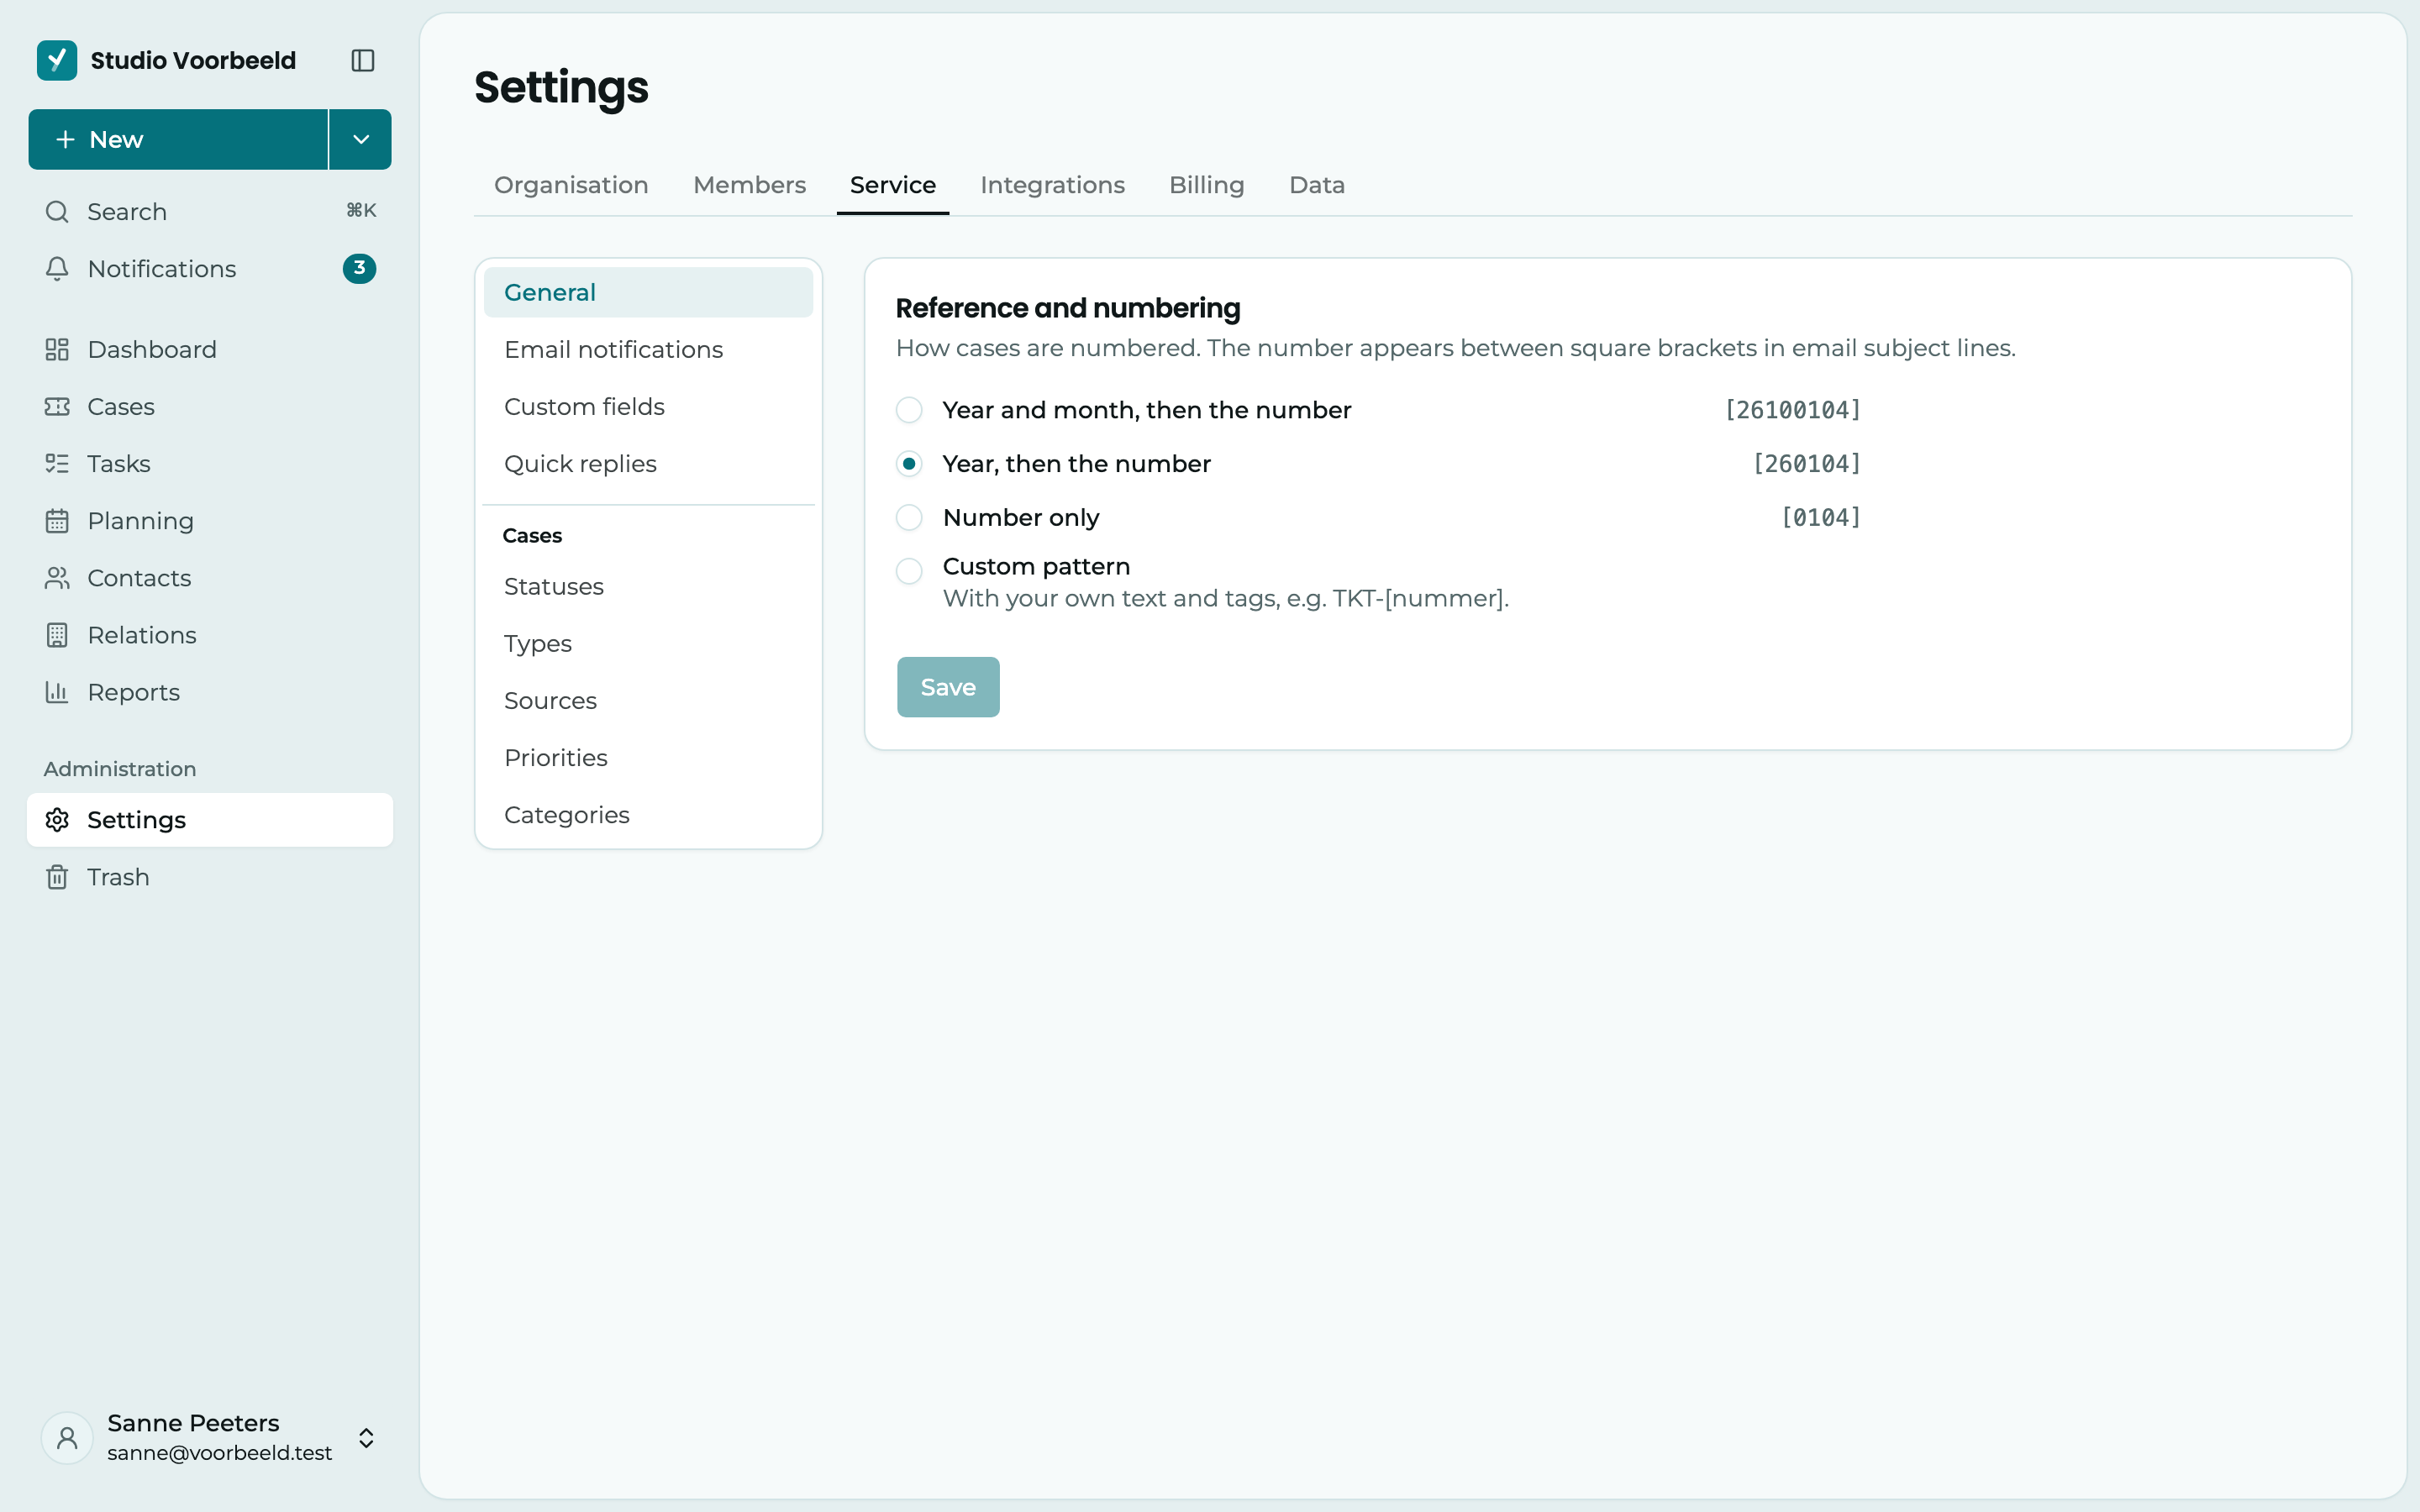
Case numbers
Under General > Reference and numbering, you choose what a case number looks like. The number appears in square brackets in the subject line of emails, which is how a customer's reply reaches the right case.
Choose one of the set formats. Next to each format, you see an example.
- Year and month, then the number: the default, for example
26100104. - Year, then the number: for example
260104. - Number only: for example
0104. - Custom pattern: with your own text and tags, such as
FILE-[year]-[number].
With Custom pattern, you build the Reference pattern with these tags. Click a tag to insert it where the cursor is. They work in English and in Dutch.
| Tag | Becomes |
|---|---|
[year] or [jaar] | The last two digits of the year, for example 26 |
[month] or [maand] | The month, for example 05 |
[day] or [dag] | The day, for example 15 |
[number] or [nummer] | The sequence number. If it is not in the pattern, it goes at the end. |
With Number length, you choose how many digits the sequence number has. It is padded with zeros: with 4, 104 is written as 0104. Below the field, you see an example for today straight away. Click Save.
The sequence number starts again at 1 as soon as the smallest date part of the pattern changes: every year with [year], every month with [year][month]. If there is no year in the pattern, it simply keeps counting.
A new pattern applies to new cases. Existing cases keep their number.
Automatic emails to customers
Under Email notifications:
- Confirmation email for a case: a customer who emails automatically gets a confirmation. It is off by default: turn it on once you have read the text under Contents of the confirmation email. With the tags under Available fields:, such as
[case_number]or[contact_first_name], you put in the number or the customer's name. Each tag shows what it fills in. Default text puts the original text back. - No confirmation email to these addresses: for example a supplier who sends invoices, or an address that sends automatic emails. That way, you avoid two systems replying to each other endlessly.
- Never CC these addresses: addresses Yusral removes from the CC when you respond on a case, for example your own shared mailbox.
Type an address and press Enter, space or comma. You can also paste several addresses at once. Click Save.
Custom fields
Is there a piece of information missing that matters to you, such as a Contract number or a Site address? Under Custom fields, click New field.
Give it a Label and choose the Type: Text, Number, Yes / No, Date, Single choice or Multiple choices. For a choice field, add the Options. Tick Required if it has to be filled in, and Show in the cases list if you want to see it as a column in the list.
If you delete a field, the values that were in it are lost.
Quick replies
Do you often write the same thing, such as we have received your documents? Turn it into a template under Quick replies with New quick reply. Tags fill in details automatically, such as the contact's name or the case number.
In a case, you then choose it with Quick reply and adjust it where needed.
Statuses, types, sources, priorities and categories
You can adjust each of these lists yourself: change names, choose a colour, drag the order, and mark one as the default for new cases.
If you set up your organisation in English, you get these by default:
| List | Default |
|---|---|
| Statuses | New, Open, Waiting, Closed |
| Priorities | Low, Normal, High, Urgent |
| Sources | Phone, Email, Chat, In person, Internal |
| Types | Incident, Change, Question, Information |
The sector you chose during setup may already have added its own values, or put its own types in their place. The four default statuses always stay, because the automatic statuses use them. You can rename them, though. As long as you do not rename them, everyone sees the default statuses and priorities in their own language: a colleague who uses Yusral in French sees Nouveau rather than New. A name you choose yourself stays as you wrote it, for everyone.
Don't you use a type, source or priority? Then turn off Show the type on cases, Show the source on cases or Show the priority on cases. The field then disappears everywhere.
Automatic statuses
Under Statuses > Automatic statuses, you link four events to a status. That way, nobody has to keep the status up to date by hand.
| Event | Default |
|---|---|
| Default assignment for new cases, from email or by hand | New |
| Action: Waiting for a reply: you send a reply to the customer | Waiting |
| Action: Reply received: the customer replies | Open |
| Action: Closed: someone clicks Close | Closed |
For each event, choose which status goes with it. If you want to reply once without the status changing, choose Send without changing the status, see Handle a case.